

How To Make A Warp In Minecraft
Activeness: Warp Belt
One of the most enjoyable activities when playing Minecraft is to build houses. Oft, these houses are spread all over the world. Sometimes while exploring, you might notice awesome hidden temples or villages in remote locations. It can be challenging to recall how to become back to all of those places. In this action, you lot'll come across how to create a tool that you tin can utilise to teleport between all of those different locations. This 'Warp Belt' volition save the locations in retentivity by using arrays so you can hands jump between them all.
You'll support 4 main commands in this program:
- Delete: This creates an empty array, effectively deleting your old one.
- Relieve: This saves your current position to the next empty spot in the array.
- Warp: This command, when entered with a number, teleports the actor to the position stored at that alphabetize in the assortment.
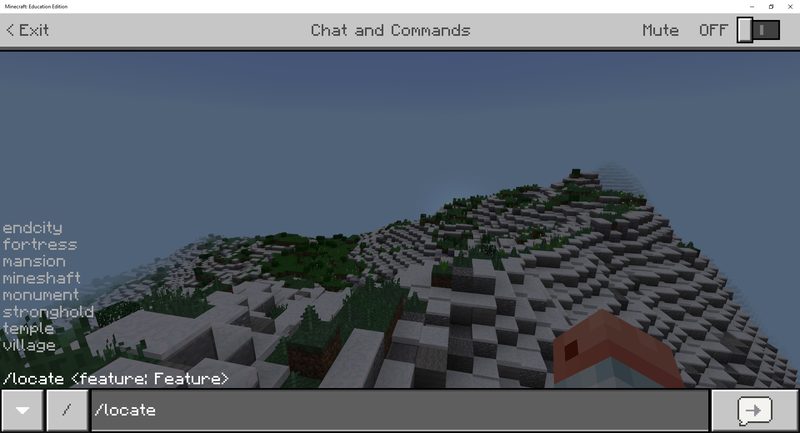
- Listing: This control prints all the positions in the array, with their index numbers.
Do the activity
Create an empty assortment
-
Create a new MakeCode project called Warp.
-
From
||loops:LOOPS||, drag a||loops:on first||cake onto the coding Workspace. -
Open
||variables:VARIABLES||and Make a Variable. -
Proper noun this variable
warp_array, and click Ok. -
From
||variables:VARIABLES||, elevate a||variables:ready||into the||loops:on starting time||. -
From the
||variables:prepare||drop-down card, select thewarp_arrayvariable.
Now let's set up ||variables:warp_array|| to a new array.
-
Click the Advanced tab in the Toolbox to display
||arrays:ARRAYS||. -
From
||arrays:ARRAYS||, elevate||arrays:create array with||into the||variables:set "warp_array" to||. -
In
||arrays:create assortment with||, click the minus sign (–) to empty it. You should see the title modify to||arrays:create empty assortment||.
let warp_array: number[] = [] warp_array = [] Make the "delete" command
Now, permit'southward create a command to delete our array. When you "delete" the array, you simply want to set it to an empty assortment then you are deleting the assortment's contents.
-
From
||player:PLAYER||, drag an||player:on conversation command||onto the Workspace. -
Name this control delete.
-
Right-click the existing
||variables:set||in||loops:on start||and select Indistinguishable. -
Drag this new
||variables:set||cake into||player:on chat command "delete"||. -
From
||player:PLAYER||, drag a||player:say||later on||variables:set||. -
In
||player:say||, enter a message, for case,"Array deleted".
let warp_array: number[] = [] role player.onChat("delete", part () { warp_array = [] player.say("Array deleted") }) warp_array = [] Make the "save" control
To save locations into our assortment, you will want the relieve control to add the electric current position to the end of our assortment when we call it.
-
From
||actor:Player||, elevate some other||player:on chat command||to the Workspace. -
Name this command save.
-
From
||arrays:ARRAYS||, elevate||arrays:add value to end||into||thespian:on chat command "save"||.
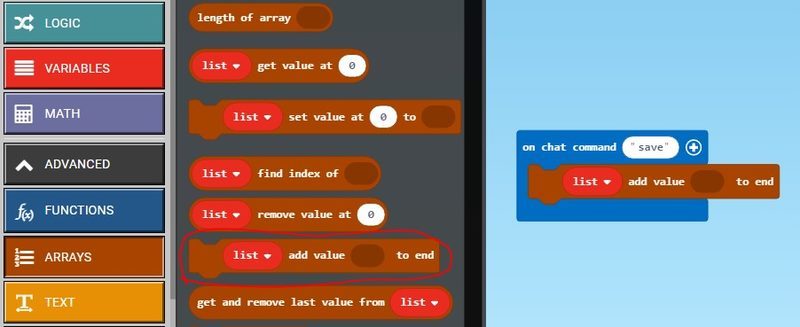
Set the position into the warp assortment
- From the
||arrays:add value to end||drop-down carte du jour, selectwarp_arrayas the array you want to add values to.
You are saving positions, and so you need to adapt ||arrays:add together value to end|| a little more.
- From
||histrion:PLAYER||, drag a||player:role player world position||into the Add value of||arrays:add value to end||.
permit warp_array: Position[] = [] warp_array.push(histrion.position()) -
From
||player:Histrion||, drag a||player:say||block after the||arrays:"warp_array" add value "role player world position" to end||block. -
In the
||histrion:say||block, enter a bulletin, for example,"position added".
let warp_array: Position[] = [] role player.onChat("delete", function () { warp_array = [] actor.say("Array deleted") }) thespian.onChat("save", function () { warp_array.push(role player.position()) player.say("position added") }) warp_array = [] Create a "warp" command
The actor will utilize the warp command by passing in a number, such every bit "warp 1" or "warp 2", to teleport themselves to a saved location in the assortment.
-
From
||histrion:PLAYER||, drag a||player:on chat control||to the Workspace. -
Name this control warp.
-
In
||player:on chat command "warp"||, click the plus sign (+) to add a parameter. It is callednum1by default. This is a variable. This is the number of the location you desire to warp to. Recall that in arrays, the number where something is stored is called the index or key. You will pass in the index hither through||player:on chat command "warp"||. Then you will get the information stored there.
Therefore, if you wanted to warp to our third saved location, you lot would enter warp three in the chat window. The computer goes to the third location and gets your coordinates for you!
-
You lot should always proper noun variables something meaningful. Rename
num1toWarp_LocationNum. -
From
||player:PLAYER||, elevate||player:teleport to||into||thespian:on chat command "warp"||.
Now we merely need to become the information stored in our array.
- From
||arrays:ARRAYS||, drag||arrays:become value at||into||player:teleport to||and replace the existing coordinates block.
allow warp_array: Position[] = [] player.teleport(warp_array[0]) -
From the
||arrays:get value at||drop-down bill of fare, select thewarp_arrayvariable. -
From the
||variables:VARIABLES||, dragWarp_LocationNuminto the 2nd slot of the||arrays:get value at||.
allow warp_array: Position[] = [] role player.onChat("warp", function (Warp_LocationNum) { role player.teleport(warp_array[Warp_LocationNum]) }) At present, when you call the warp command with a number, the code will catch the position in the spot yous specify. Then you will teleport to the position stored in the assortment.
Additional improvements
There are a couple of ways y'all can improve this warp command. Some of these improvements will be challenges y'all will demand to complete. However, earlier yous get to the challenges, try to do one more matter:
- Click the JavaScript tab at the superlative of the screen to see your program in the JavaScript editor.

-
Detect the
player.onChat("warp" ...function. -
In the following line of code, decrease
anefrom the index past changing to:
thespian.teleport (warp_array [Warp_LocationNum - 1])
The function now looks like this:
histrion.onChat("warp", role (Warp_LocationNum) { histrion.teleport(warp_array[Warp_LocationNum - 1]) }) - Click the Blocks push at the top of the screen to go back to the Block editor.
You will see that the block editor chose the proper blocks for yous. Yes, yous could have done this in blocks, but information technology is adept to get used to seeing pure lawmaking and not being scared of it.
Completed Code
let warp_array: Position[] = [] player.onChat("delete", function () { warp_array = [] player.say("Array deleted") }) thespian.onChat("save", function () { warp_array.push button(actor.position()) player.say("position added") }) role player.onChat("warp", role (Warp_LocationNum) { actor.teleport(warp_array[Warp_LocationNum - i]) }) warp_array = [] 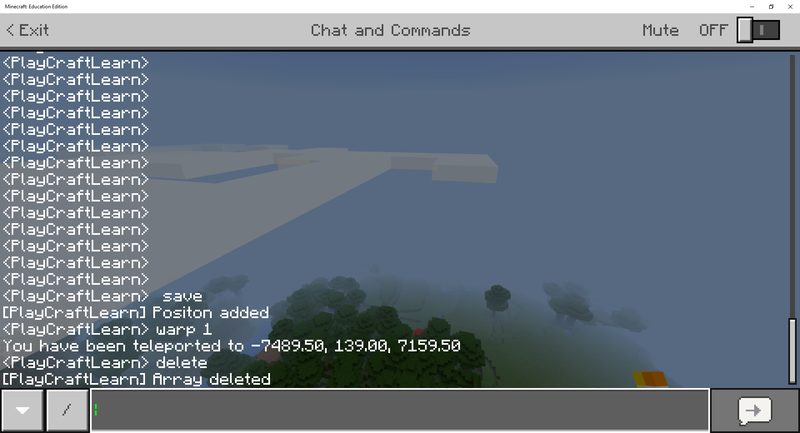
Challenges
Permit's continue to better our warp belt lawmaking by checking what the user enters and giving them feedback.
Challenge i - Brand Sure a Valid Jump Spot Was Entered
In that location is i more improvement yous can do to make your program more user-friendly. If the player enters a number that is larger than the last index in the array, at that place should be some sort of a alarm. Otherwise, it'south odd to enter a command and accept nil happen. It is good programming practice to give feedback to the user for bad input or other errors.
You will need to practise the post-obit:
- Add an if argument to check what was entered.
- Check to run into if value is bigger than size of
warp_array. - If bigger, give a alert message similar "Sorry, no such location".
- If the aforementioned or smaller than size of
warp_array, you will teleport the player.
Y'all will need to fix up your if statement and find a way to become the size or length of warp_array.
Challenge ii - Print All Saved Warp Coordinates
You need to impress the list of all saved warp coordinates in a world.
To exercise this, you can use a special loop.
allow warp_array: Position[] = [] for (allow value of warp_array) { } There are several ways to practice this. You could brand a ||function:office|| to handle this and telephone call the role afterward each save. You could utilise an ||player:on conversation command||.
The basics are to loop through ||variables:warp_array|| and impress its contents. Once more, with printing you have options. You lot could use ||player:say|| blocks to display the contents in the chat window, or you might write the results in the heaven with blocks past using the ||blocks:print|| block.
The solution given uses a part. The function is called after every salvage.
Experiments
Here, there are no rules… Re-create this code for the experiments and change things around to see what kind of results you can create. Suggestions are given, just practise as you lot like!
Experiment 1
Enter relieve in your conversation window, then press enter. You lot should encounter directions prompting y'all to enter a number at present. You will at present save coordinates and keep a name of the type of location continued to this.
Enter list to list all the locations you have saved.
This code does a few things. Kickoff, it uses multiple arrays that have connected information. This means the same index works with multiple arrays and the data yous go is continued. In ane array, the coordinates are stored; in another, the names of the locations. A third assortment is used to keep the default locations, simply it is not necessary to do it this style.
What places does it salve?
What other things could you lot do with teleporting or coordinates in code? Can y'all use arrays creatively to make the code more complex?
What well-nigh saving a monster blazon to each location? Then when you warp back, it spawns that monster! You could make a teleporting game with missions to teleport to unlike locations, kill all the monsters in that location (which you spawn with code), and then teleport to the next location.

How To Make A Warp In Minecraft,
Source: https://minecraft.makecode.com/courses/csintro/arrays/activity-2
Posted by: dentoncorties.blogspot.com
0 Response to "How To Make A Warp In Minecraft"
Post a Comment