

How To Setup Obs To Record Minecraft
How To Record Minecraft for Costless with OBS

FOLLOW THE INSTRUCTIONS BELOW
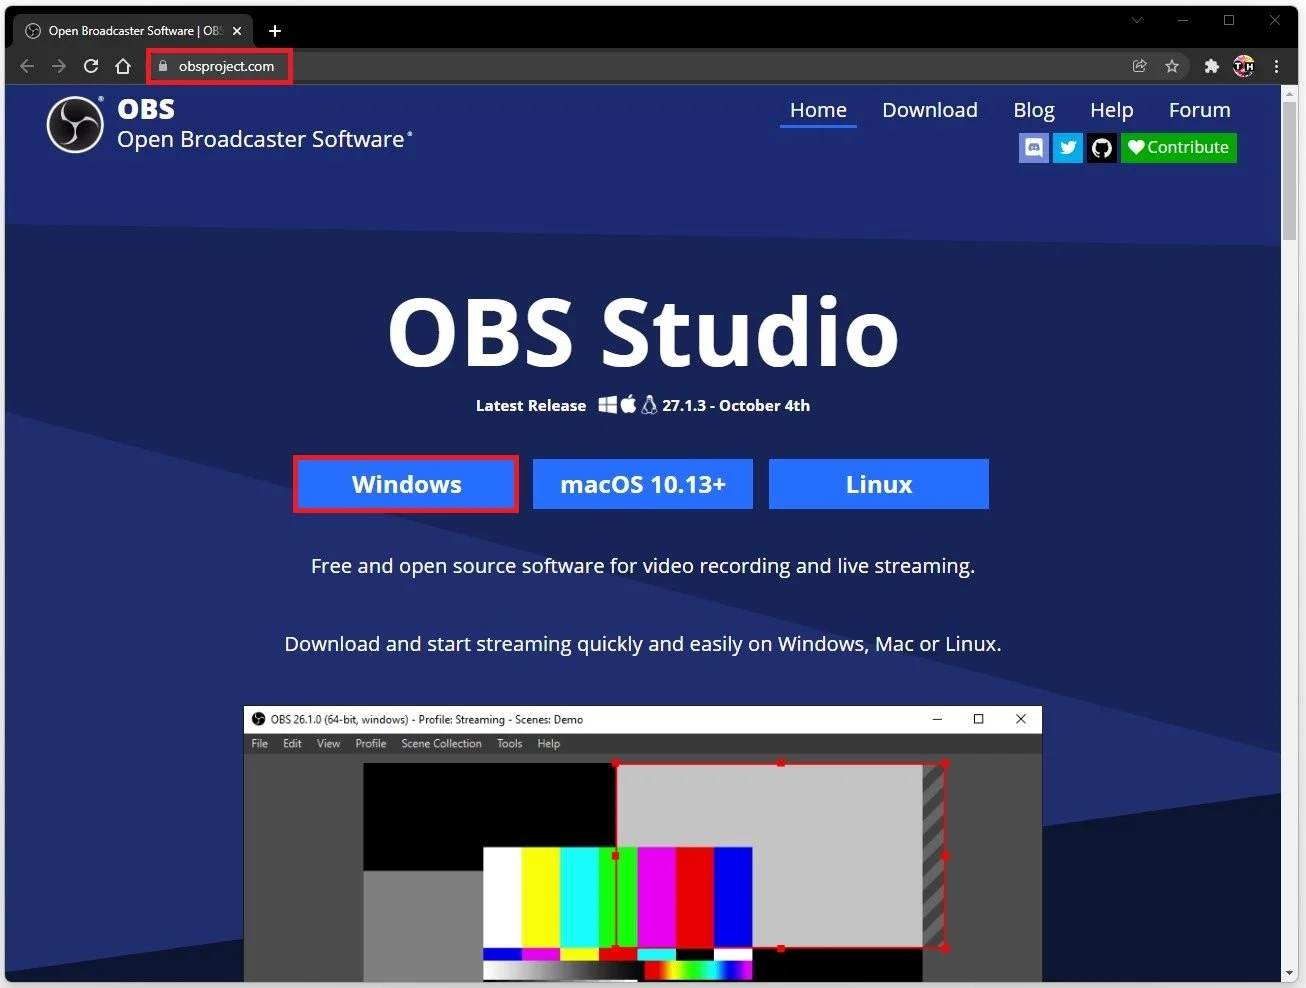
Install OBS
Starting time, in case you don't take OBS installed on your PC, then navigate to obsproject.com. From here, you tin download the installer for Windows, MacOS or Linux. In my instance, I will download the OBS installer for Windows. The download will take a minute, and your browser can assistance you find your downloaded files.
After the installation is done, simply double-click this icon to open up OBS.

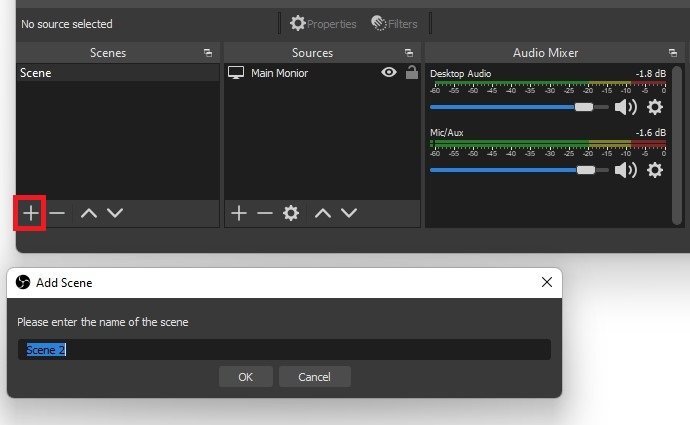
Create Scene
To get started, make certain that you have a scene set up. A scene is equanimous of different sources. Now, I will create a scene to record my computer screen. Click on the plus icon to create a new scene, and I will rename this to Minecraft Record. You could also simply rename your existing scene.
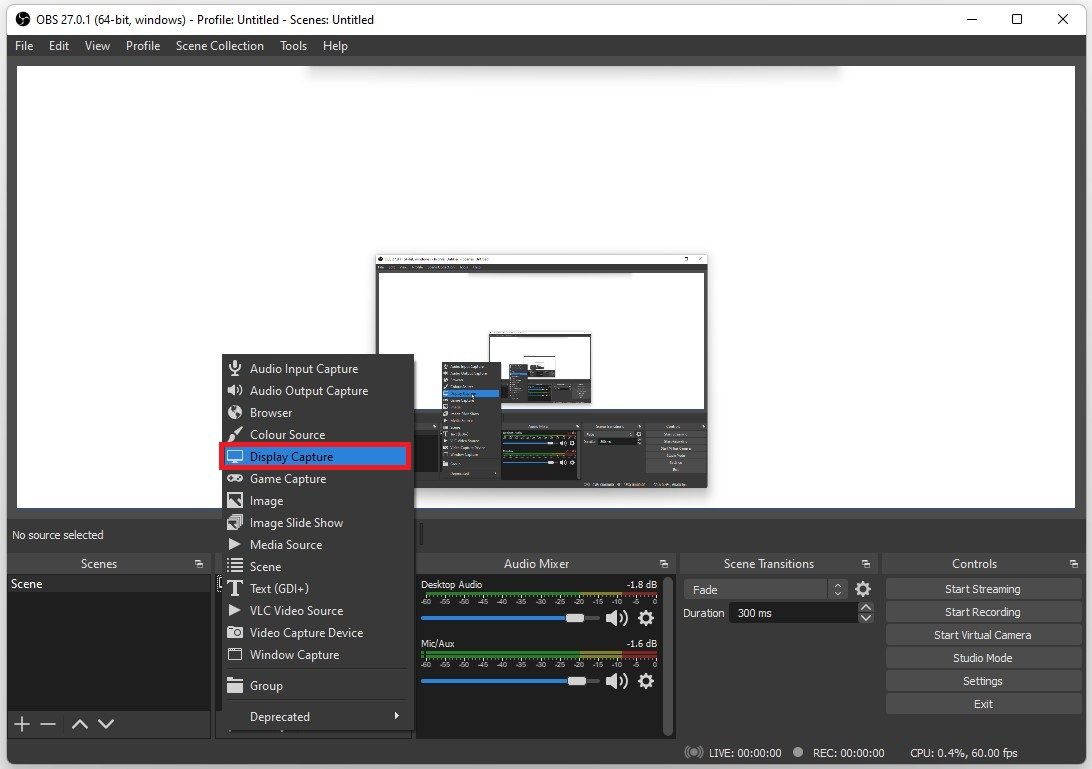
Display Capture Source
Next, nosotros will need to add a Display Capture source. Name it any makes sense for you. I volition call it Master Monitor.
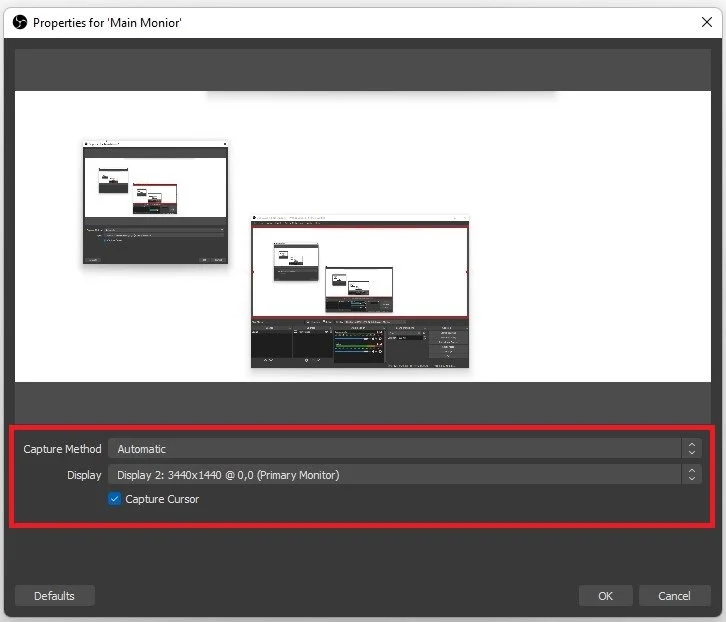
Click on Ok, so exit the Capture Method choice to Automated if this choice is available for you, and beneath select the correct Display which should be captured. Y'all likewise have the option to forbid OBS from recording your cursor, but I like to go along this option enabled. Adjacent, when clicking on Ok, the source will be added and you lot should be able to come across your screen.
Game Capture Source
If you prefer, you can too add a Game Capture source, which will just record your Minecraft window and non the entire screen. This can be beneficial when not playing in fullscreen mode. To practice and so, brand sure that Minecraft is running in the background and and then select to create a new Game Capture
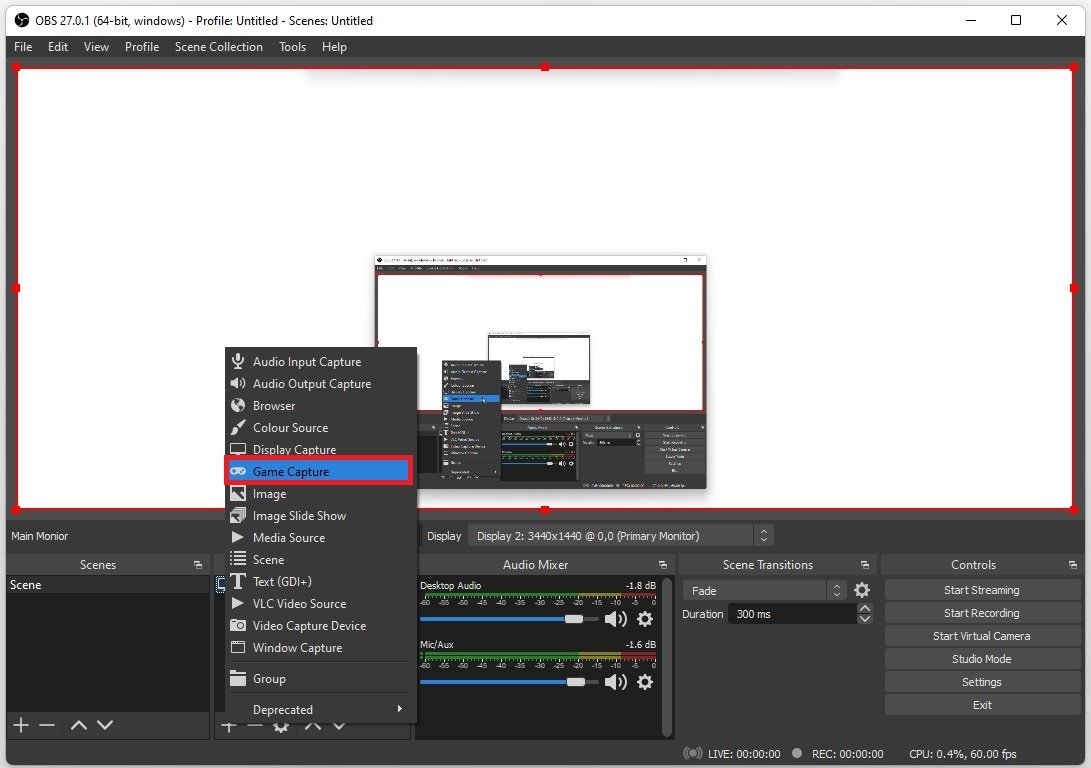
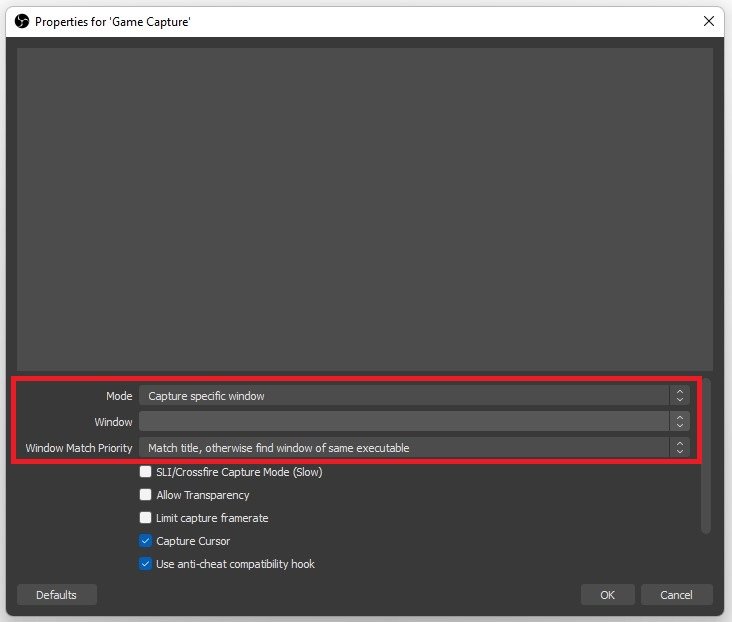
Name it whatever makes sense to you and click on Ok. Hither, nether Manner, select Capture specific window. Below, under Window, brand sure to select the Minecraft.exe window. When clicking on Ok, you should see the Minecraft window displayed in your OBS preview.
Resize Sources
In example yous are using an abnormal screen resolution, or if OBS is displaying a zoomed in screen for other reasons, and then you take the pick to resize and modify the manner OBS records your screen.
Simply click and elevate the handles on the sides to resize your image. You tin can also employ the shortcut CTRL + F to quickly zoom out and recenter your screen recording prototype. When holding Shift while resizing, the image will recenter and adjust the epitome to the height of the recording sail.
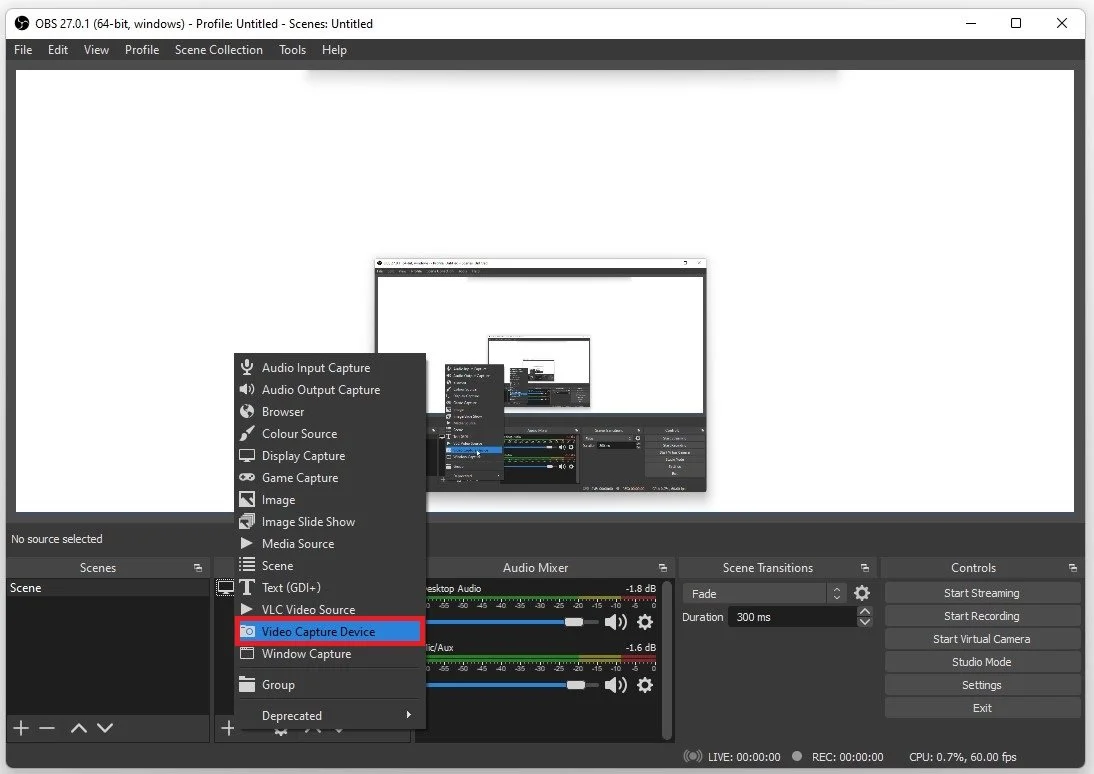
Video Capture Device
Next, you can add together boosted sources, such as a Webcam. To practice so, select to add a Video Capture Device.
Audio Mixer
Y'all should now move your attention to the Audio Mixer panel. This will permit you to decide which audio sources volition be picked upwards past OBS, also every bit making sure that none of the sources are besides loud or also quiet.
Your Desktop Audio is the sound from your PC. Your Mic / Auxiliary slider lets you change your microphone input volume. You lot might have other audio sliders below, such every bit your Video Capture Device, which is your webcam or other microphone.

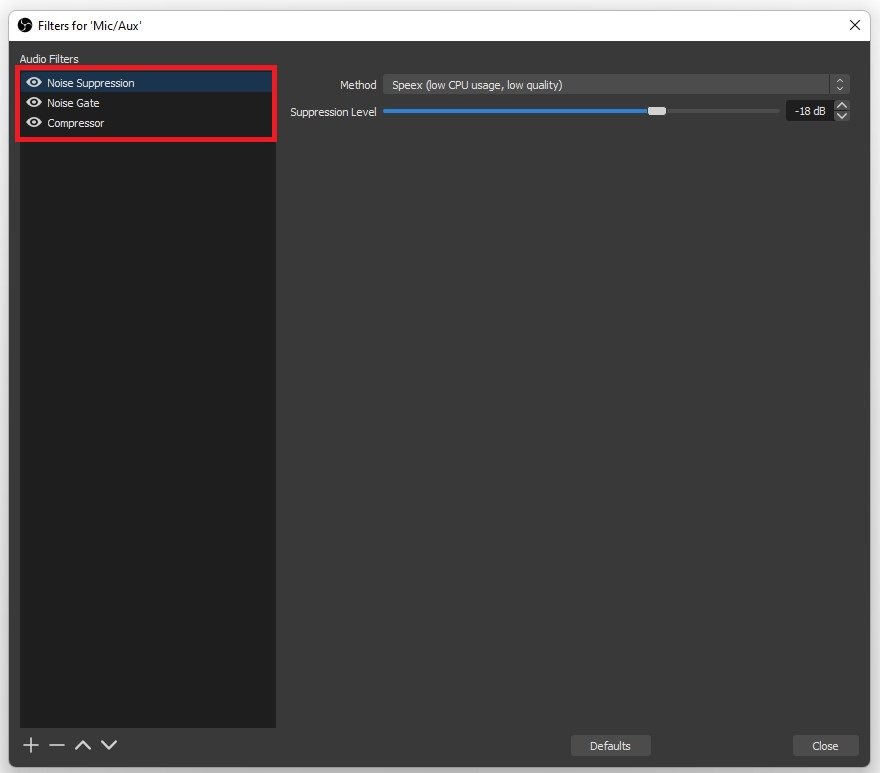
When clicking on the gear icon of your Microphone sound input, you tin can add filters which will allow you to meliorate your overall microphone quality by using a Noise Gate, Limiter or Compressor.
Car-Configuration Wizard
To quickly optimise your OBS recording settings, you should make use of the Machine-Configuration Sorcerer.
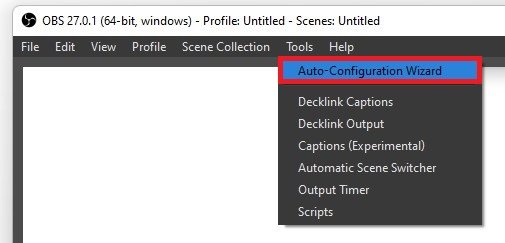
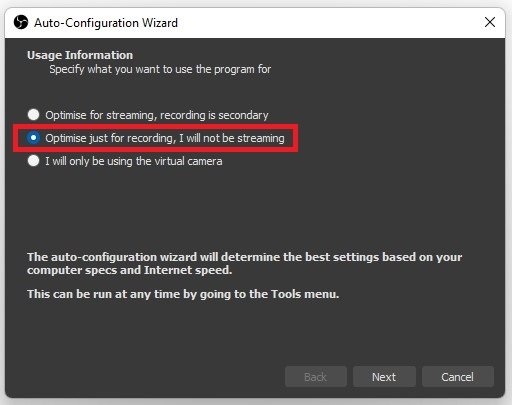
Nether Tools, select the Motorcar-Configuration Wizard pick, and y'all volition be presented with three options to choose from. Co-ordinate to your preference, OBS volition adapt your recording settings. In this case, we will Optimise OBS for recording and not streaming, so cull this pick if it'due south according to your preference.
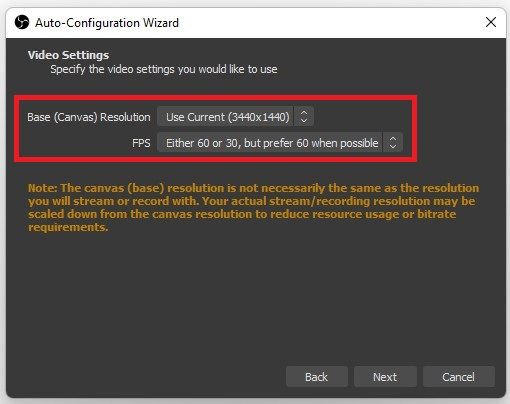
Click on Next, and here make sure to set the Base of operations, or Canvas resolution to your native monitor resolution. In my instance that would be 3440x1440. Set your FPS option to Either threescore or 30, only prefer sixty when possible. This will let OBS to cull the best choice, depending on your CPU and GPU usage.
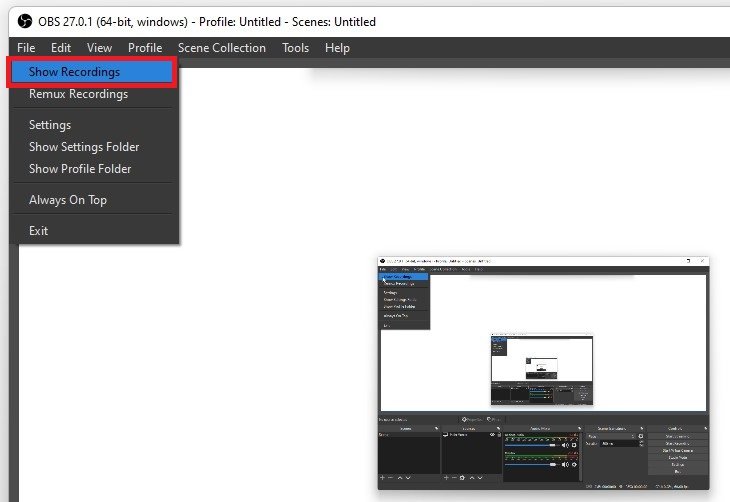
Tape Minecraft
Now, in order to record your Minecraft gameplay, simply select Get-go Recording, and then Stop Recording again when you're done. When navigating to File, you lot tin can select Show Recordings, which will open up your default folder where OBS recordings will exist saved.
In order to add shortcuts to start and stop recordings, or to modify your default folder, brand sure to open up upward your Settings.
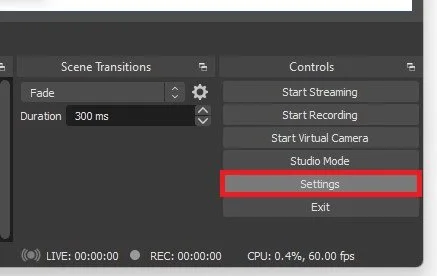
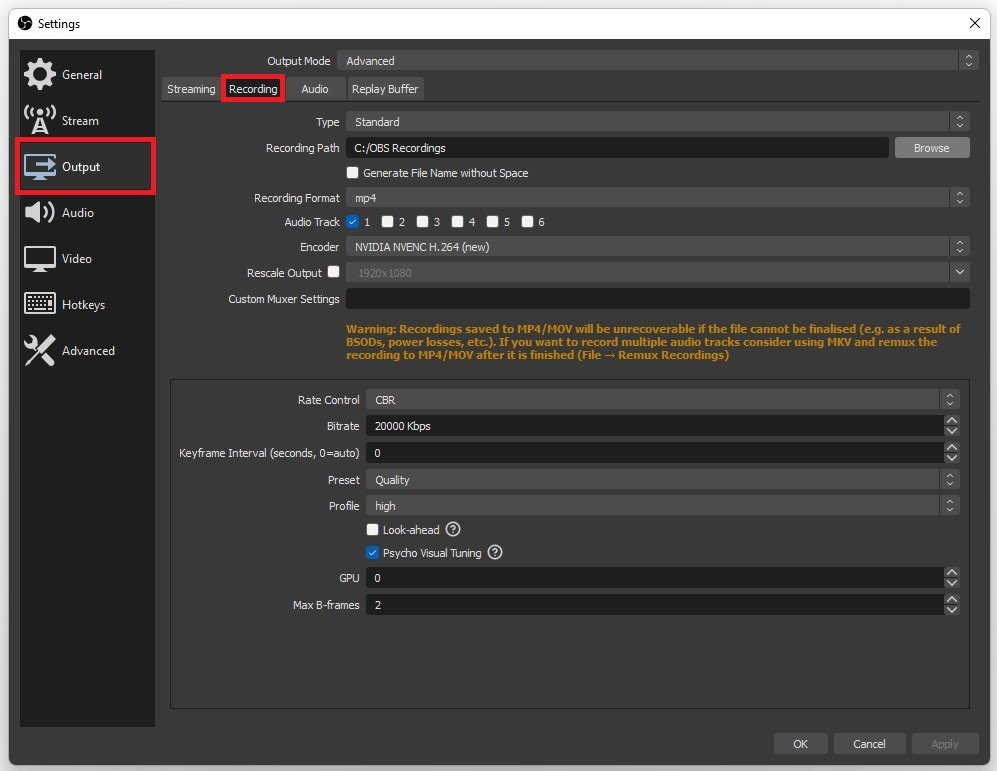
Output Settings
Under Output, navigate to the Recording tab. Here, you lot have the option to modify your Recording Path. Click on Browse, and here choose an existing or create a new binder in your file explorer to where your OBS recordings should be saved.
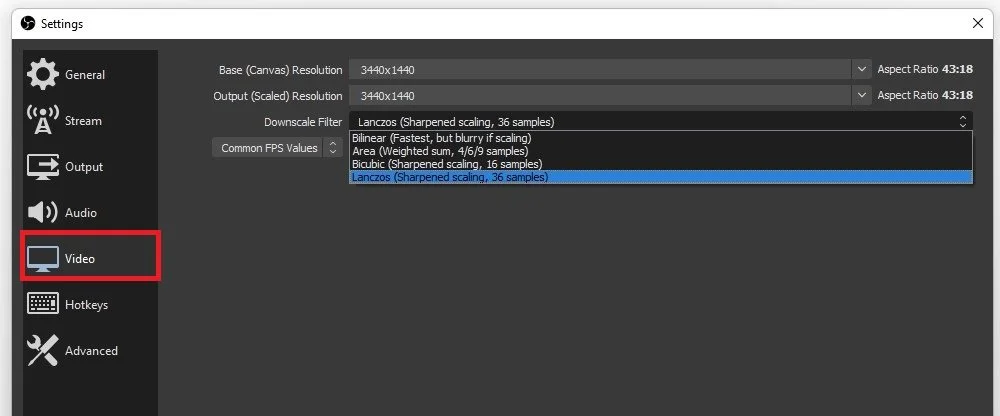
Video Settings
Under Video, you lot can rescale your output resolution if you wish to practice then. This can be helpful for users with a wide screen aspect ratio for example. I prefer to utilise the Lanczos Downscale Filter, every bit information technology will provide the sharpest recorded video, but you might want to reduce it to Bicubic if yous're using a depression-finish PC.
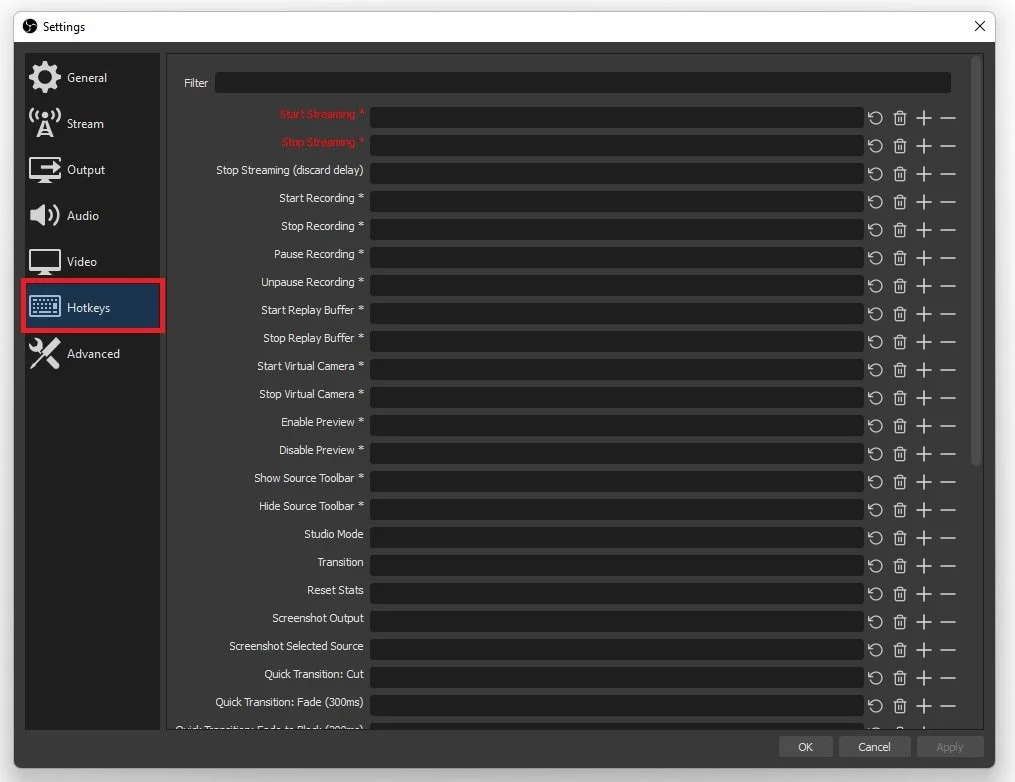
Hotkeys Settings
Under Hotkeys, yous take the choice to gear up custom shortcuts to beginning and cease streaming, start and stop recording, pause your recording and much more.
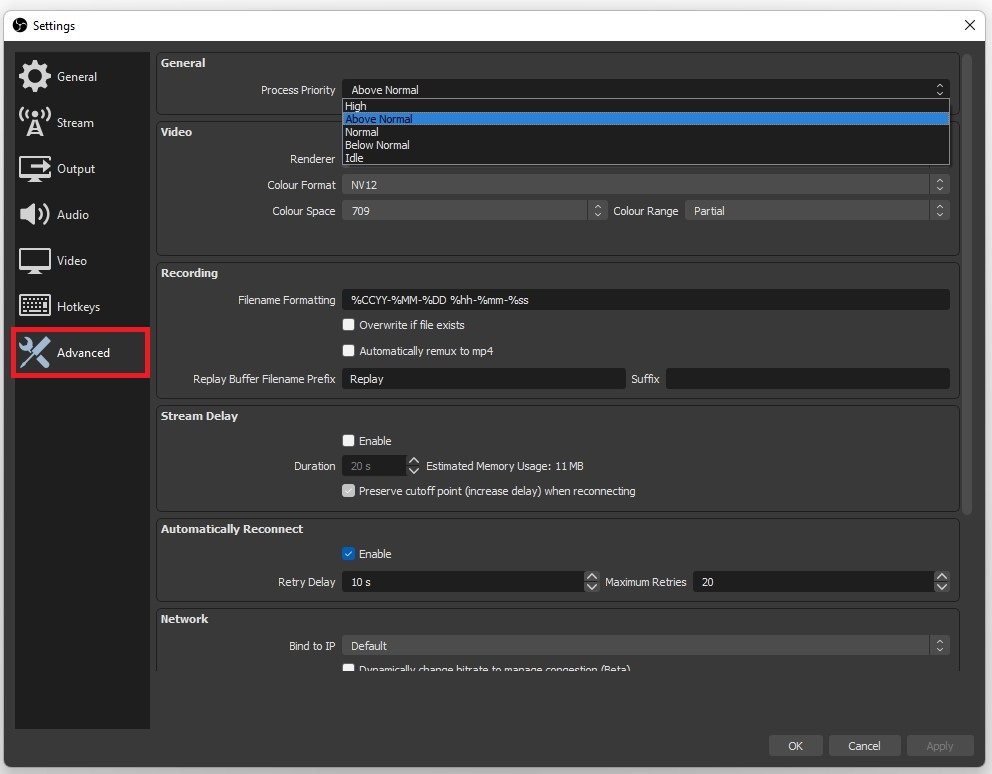
Advanced Settings
Lastly, under Advanced, I propose setting the Process Priority choice to To a higher place Normal. This will brand sure that OBS will run fine if other resource intensive applications are as well running on your PC. Subsequently applying your changes, you should exist able to record your Minecraft gameplay for free using OBS Studio.


How To Setup Obs To Record Minecraft,
Source: https://www.techy.how/tutorials/record-minecraft-obs
Posted by: dentoncorties.blogspot.com
0 Response to "How To Setup Obs To Record Minecraft"
Post a Comment